Featured Post

Introducing: The Meanest Looking Custom Built Skyline R34 GTR 1/7th Scale Remote Control RC Car

Passion, It's the thing that drives us to achieve. The push we feel to dare to dream something, ideal, and then manifest that vision into reality. For anyone who's ever fallen head over heels into an engine bay, or body work, or getting your car track ready, YOU KNOW that feeling that drives you to customize and make things as you feel they should be. Your intuition is second to none.  RC Car Skyline GTR R34 Custom Built Remote Control Car This GTR is no different from any of the other incredible cars featured on this site ( just look around; there's red ones , blue ones , silver ones , white ones , black ones ) - except for one, small, detail. - It's 1/7th the size! You wouldn't be able to fit inside it, but it still rips around like a GTR should, and is a whole lot of fun to drive I'm sure, and the customization on this build is phenomenal.  Nissan Skyline GTR RC Car Rear End Spotted on the RC sub, user XJuggernaut101 shared their build story with us of ho

Custom Interior Instrument Cluster and Dash Console Gauges Racing Seats and Steering Wheel and Electronics Controllers

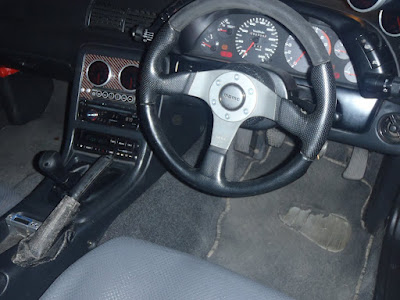
Custom Interior: 4 Defi gauges and Controller, pillar mounted, Veilside 340 km/h speedo, Momo Racing wheel, Nismo Shifter, Leather boots with Red Stitching
Custom Interior: 4 Defi gauges and Controller,Black and Red Carbon Fibre panel and pillar mounted, Veilside 340 km/h speedo, Momo Racing wheel, Nismo Shifter, Leather boots with Red Stitching, HKS Turbo Timer, Blitz Dual SBC Boost Controller, Oil Press. Temp, Water Temp and Boost Gauges, Pioneer stereo and relocated Climate Control and R34 GTR Racing Seats.
As part of the campaign to update the interior, and make it more functional many people modify the center console to better suit their needs. Fortunately, Nissan had the foresight for this and accommodated its fans by making the center console exactly 3 DIN units stacked on top of each other. The climate control unit is also exactly one DIN large and can be relocated to any number of places.


We start by removing the gear shift knob and the shifter boot, this gives you access to 4 screws, which when removed will allow the center console trim to come off. From there, depending on your own set up, you can remove the triple gauges, the stereo, the climate control, all the brackets, and ashtray and cigarette lighter.
Center Console Wiring
Wiring for instrument Gauges
Defi wiring for control unit
My plan involved a lot of wiring, and custom work. I wanted to install 2 Defi Gauges for water and oil temperature, the Defi control unit, a stereo (later on) and the Greddy turbo timer. I also wanted to relocate the climate control unit. So with everything out of the way I started by wiring up the Defi sensors, which need to connect to the control unit, so I fed them through behind the dashboard, coming from the engine bay, and right to where the control box would be.
Wiring Harness
Greddy timer harness


Then it's down under the driver side dashboard to connect the ignition harness for the turbo timer. I extended the harness to reach the center console, having this little optional harness makes life a lot easier than having to splice into the ignition wires. It's far safer, and much quicker too. It also allowed me to pick up the power, accessory and ignition wiring for the Defi control unit as well, again rather than splicing into the wiring of the car itself.


I'd decided to change out all of the old white and green light globes for new red LED's, which I'd ordered from a member on the Australian forum. I started with the instrument cluster, as this was only a matter of swapping the bulbs directly and didn't require any customization at all. The end result of this swap was quite nice I think, pictured below:
Upgraded instrument cluster speedometer
Veilside 340 km/h instrument cluster with red LED's
Climate control unit customization
Dismantling the AC unit
Climate control LED lights
Replacing bulbs with LED's
Normally the climate control unit shows a dull green lighting scheme, but to keep with the theme it needed to be changed over to the red LED's as well, this part required a little bit of custom work. It's quite simple to remove the unit, and dismantle it, this gives you access tiny light bulbs, replace them with the LED's and close it up and it's all done and ready to go. Depending on which LED's you use, you may need to use a small grinder from a Dremel to enlarge the area for 2 of the LED's as they don't fit under the face plate, and the buttons, with a careful hand it isn't too hard to accomplish.
Now, it was time to address where exactly the climate control would be moved to. Some people move it to the glove box, which is fine if you don't want to be able to use the climate control while driving. Sort of an impractical solution. Other people move it to the center glove box under the arm rest, I find this location impractical also, as you have to look down into the arm rest to change the temperature. Both of these approaches also require a harness extension, to make the wiring reach the new location. Instead I decided to remove the cigarette lighter and ashtray, and make the unit fit into the space there. It required no extra wiring, and only a minor amount of cutting and trimming. So to start I trimmed the console surround of its ashtray and cigarette lighter.
Center console Surround plastic
Then, using some sheet metal, I fabricated some mounting brackets, bent them to hold the unit in place, and secured it down with screws. I'd only seen this done on a few cars from the U.K. prior to my attempt, so I didn't have much to go on, but in the end it turned out to fit really nicely in it's new location:
I quickly snapped on the face plate and the console surround, it looked pretty good, and would require maybe a piece of rubber along the bottom to make it look less custom and more factory.
Gauge Control Unit
With the center console plans coming together nicely, I needed to put the oil pressure and boost pressure gauges somewhere. I ordered a Greddy A-Pillar dual gauge pod and fitted it to my A-pillar. Installing the Greddy gauge holder is simply a matter of positioning it where you like on the A-pillar, and securing it with the 3 screws provided.
Gauge Dual A-Pillar Pod
Installation required me to run the gauge wiring from the center console, back through the dashboard and up into the A-pillar, but once it was all installed, I think it turned out quite nice.
A-Pillar Dual Gauges
Now, with the cluster finished and the A-pillar looking sharp and clean, I focused my attention back to the center console itself. The climate control unit was working out well, but I had nothing to hold the 2 temperature gauges, and the control unit.


Cutting Carbon FiberBlack Red Carbon FiberA friend of mine fabricated a Carbon fiber-Kevlar red and black weave for me to use as a center consoler backing plate. So I trimmed it to the exact shape of 3 DIN units, and then traced out a template for the gauges and the Defi control unit. I cut the holes for each, and secured the gauges in place. Then I fabricated 2 brackets to hold the Defi controller, secured them in place with rivets and the finished product was rather sharp looking.
Mounting carbon fiber
Through all this, I decided I did want a stereo installed later on, so I would need to leave exactly one DIN unit to fit the stereo in at the bottom, which meant I needed to fins a new place to mount the Greddy turbo timer. The timer had a blue screen which didn't match my theme of red lightning, and I felt it would be an eye sore to have one blue screen against all that red.
wiring for boost controller install
My solution was to move the Greddy unit to the notched area just after the center arm rest. It would sit low, and out of primary eye-sight but would still be easily accessible when I wanted to use it, which might be frequently on track days seeing as it has a tonne of other features like; volt meter, time attack meter 0-100, 0-200 etc...
Turbo timer wiring harness
So I extended the Greddy wiring harness myself, and lifted the center console out completely to run the wires for it, I also needed to tap into the brown wire to give it the signal for the hand brake being up or down, and another wire needed to tap into the ECU wiring loom to pick up vehicle speed, as this unit can automatically choose a cool down time based on how long you drove the car and how fast you drove it. The finished result of that can be seen in the photo below, that blue light in the center console is the Greddy unit all wired up and working properly:
Red LED Swap Interior lighting
It's a very elegant designed interior now, with a lot of functionality built into it, and I didn't sacrifice much in the way of comfort, if anything. Next I had to find a stereo and install it into the remaining DIN slot.
Interior gauges upgraded
I picked up this Pioneer unit as it met all my requirements for what I wanted in a stereo, 50 watts for each speaker, and the lighting display was red, a perfect match for my theme.
Pioneer head unit Amp
The installation of the radio is pretty straight forward following the users manual included. If you're lucky enough to find a wiring harness that will work in the Skyline then use that by all means. In my case I decided to run new speaker wires for all 4 speakers, one set of heavy gauge to each door panel, and a pair to the rear. Soldering together all the speaker wire connections, it only leaves the ignition switch power (0 Volts when car is off and 12 Volts when car is on), the constant 12V supply line, and a ground, easy enough. Using the standard oem radio brackets the new radio should bolt right in.
Custom center console
From there I trimmed the CF panel and finish it off with a bit or rubber molding to clean up the edges.
 The night display is really nice, I like the way it turned out. The reason I'd chosen all red as a theme is because red is the least distracting color to a driver, and will insure I keep my eyes on the road, where they should be. If a problem should ever arise the Defi management system has pre-programmed alerts and bells  if the oil pressure should fall too low, or temperatures get too high.
Defi gauges on full illumination


Defi gauges on dim illumination


interior shot


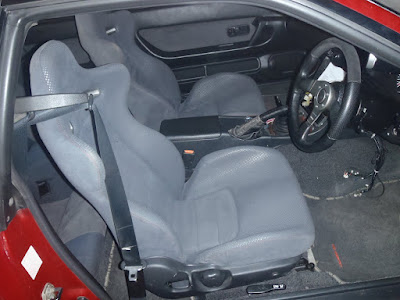
After noticing my drivers' seat was starting to deteriorate, I inquired on a few local forums for people selling Bride, and Sparco seats, but I really liked the comfort of oem seats, a friend has R34 GTR seats in his R32, and I sat in them a few times and really loved the way they felt and looked. Then I happened to come across a set of R34 seats for sale, in the city, not too far away, and at a very hard to refuse price too. I took in my old R32 seats, and traded them in towards these new R34 seats.


I had asked a few people if R34 seats were direct swap and they all told me yes. Unfortunately when I got them home I realized the seat belt buckles were different, and the r32 clip would not fit into the r34 buckle. So I asked on GTRCanada, and someone was kind enough to send me a set of R32 buckles within the week. Then I swapped the buckles over, and all fit nicely...
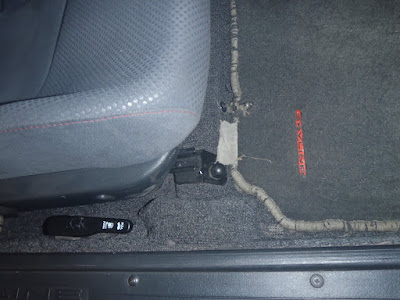
But thats not the only thing that wasn't direct fit, there was one other very minor detail. The bracket for the driver side, front right hand bolt, where it attaches to the floor, is actually flat on the R34, but bent down on the R32. This is quite easy to compensate for with one quick tap from a hammer, the metal folds over and the bolt holes line up perfectly.
So, if anyone ever asks you if R34 seats are a direct swap into an R32, the REAL answer is no...  But, it's pretty easy to make them fit. The full install of these took me no more than one hour, not including wait time for R32 buckles...

Finally with the new leather boots on the shifter and e-brake;
Custom Interior: 4 Defi gauges and Controller, pillar mounted, Veilside 340 km/h speedo, Momo Racing wheel, Nismo Shifter, Leather boots with Red Stitching

Comments

NFORSA said…
really good work mate, well done...
Unknown said…
Nice Job.. Can you have your friend make another fabricated a Carbon fiber-Kevlar weave for me to use as a center consoler backing plate? Which forum did you get LEDs? I googled but too many hits. Thanks
J L said…
Hi James, thanks! Unfortunately he doesn't make CF parts like that any more, I would suggest looking on RHDjapan or similar tuner site. As for the forum for the LED's I believe it's Skylines Australia.
Unknown said…
Nice mate - You've made it look very neat. Well done!
Unknown said…
I found your blog while looking for a solution to making a better sitting position in the R32. By chance do these seats sit any lower? I feel like the OE R32 seats sit higher under the part where the thigh and lower leg meet. I am considering an aftermarket seat, and or removeable steering wheel because its a bit snug between the seat and steering wheel for me, as I'm a big guy
J L said…
Hi Steve Ellis, Actually I DID find the R34 seats felt lower,
whether that's due to the design of the seat itself, or the fact that the rails are a bit lower I'm not sure, but definitely the R34 seats are a major upgrade in comfort (especially for larger gents) over the stock R32 seats. To give you some perspective, you can buy/sell R32 seats for like $200-$300... R34 seats are up near $500 a piece. They're way way better.
Unknown said…
Literally just saw the reply. Thank you for the input
Unknown said…
Love the build thread. I'm going to be doing an custom center console and was wondering:

What are the dimensions of the Center Console din slots?
What are the dimensions of the din slots including the bottom ashtray and cigarette lighter?

Thanks!
J L said…
Glad you enjoy it! So the DIN "area" is actually a standard dimension across multiple devices/vehicles, do a google search for ISO 7736. I can tell you that I had to remove quite a bit of material around the ashtray in order to get the climate control to fit.
Unknown said…
Did you have to move or adjust anything where the cigarette lighter and tray was? I know the transmission housing is very high right there.
J L said…
no it was rather easy